Cyber-brick by Maker World

For years, the DIY maker movement has operated in two parallel universes. On one side sit 3D printing enthusiasts, capable of fabricating complex mechanical joints, custom chassis, and sleek aesthetic enclosures in a matter of hours. On the other side reside hardware tinkerers, soldering ESP32 microcontrollers, debugging breadboard wires, and writing C++ firmware.

When these two worlds meet, the result is magic—interactive RC vehicles, robotic arms, smart home gadgets, and desktop productivity tools. Yet, for many makers, crossing the chasm between mechanical printing and electronic engineering has felt like scaling a cliff. Breadboard connections shake loose inside printed shells, custom wiring harnesses take hours to solder, and firmware configuration turns a fun weekend build into an endless debugging session.

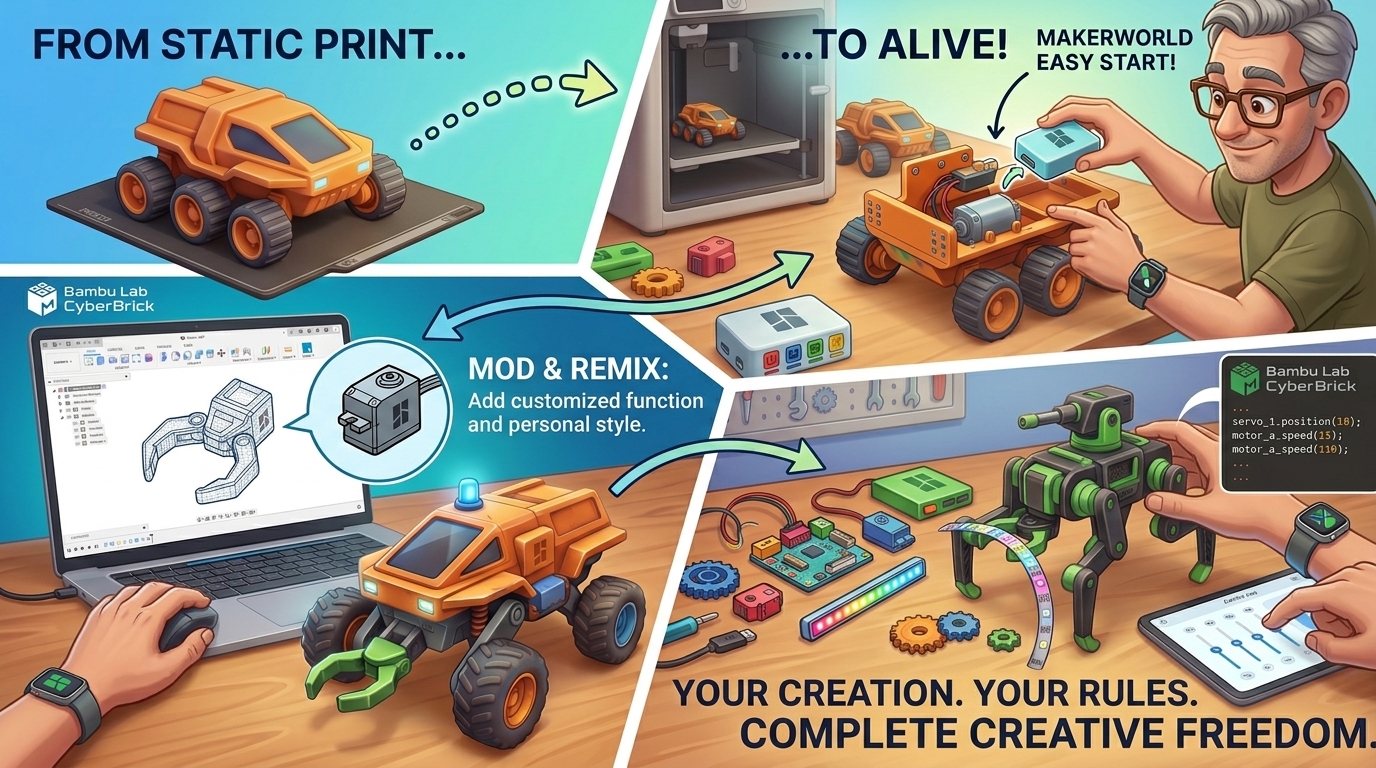
Enter CyberBrick, Bambu Lab and MakerWorld’s flagship modular smart toy and robotics ecosystem. Designed to seamlessly combine programmable hardware, solderless electronic modules, open 3D design specifications, and dual-layer coding, CyberBrick is positioned to do for 3D-printed robotics what LEGO Technic did for physical building blocks.

Here is an in-depth look at what CyberBrick is, how its architecture works, why it is reshaping the MakerWorld community, and how you can get started with your own builds.

1. The Core Philosophy: Bridge the Gap Between Plastic and Pixels

At its core, CyberBrick solves the single biggest bottleneck in home robotics: hardware-software integration. Traditionally, if a designer created a cool 3D-printed RC car on MakerWorld, anyone attempting to build it had to source a specific ESC (Electronic Speed Controller), a matching receiver, a battery management system, servos, and custom switches, all while figuring out how to stuff wires into tight cavities.

CyberBrick reimagines this by standardizing the electronics layer. By partnering with Bambu Lab’s Maker’s Supplyinfrastructure, CyberBrick provides a plug-and-play toolkit of standardized microcontrollers, motor drivers, sensor modules, and power solutions.

3D designers no longer have to design around unpredictable, off-the-shelf components. Instead, they build around standardized CAD specs and reference mounts. Builders can simply print the structural chassis, snap in standard CyberBrick modules, flash the firmware over Bluetooth or a mobile app, and immediately begin playing or customizing.

2. Anatomy of the Hardware: Standardized, Modular, Solderless

The magic of CyberBrick lies in its modular hardware design. Rather than forcing makers to pick up a soldering iron, the system uses standardized connectors, pre-wired shields, and snap-fit mounting footprints.

The Brain: ESP32-C3 Compute Core

At the heart of the ecosystem is a wireless compute unit based on the ESP32-C3 chip. This low-power, high-performance microcontroller brings built-in Wi-Fi and Bluetooth capabilities. The compute module interfaces directly with two core shield configurations:

  • The Remote/Actuator Shield: Designed to sit inside the vehicle, robot, or device. It features dedicated ports for dual DC motors, servo channels, and multi-channel LED lighting outputs.
  • The Controller Shield: Designed for human-machine interfaces (HMIs). It maps input signals through digital and analog ports designed to accept 2-axis joysticks, toggle switches, pushbuttons, and potentiometers.

Solderless Expansion Modules

Beyond simple RC driving, CyberBrick supports an expanding ecosystem of plug-and-play functional modules available via Maker’s Supply. These include:

  • Actuators: Micro-servos, high-torque geared motors, and specialized stepper drivers.
  • Sensors & Inputs: Ultrasonic distance sensors, line trackers, ambient light sensors, and physical switches.
  • Outputs & Displays: Mini OLED screens, custom LED strips, and audio buzzers.

Because every module utilizes standard connector pinouts and shared logic, the hardware you purchase for an RC Forklift today can be repurposed into a smart desktop weather station tomorrow.

3. Dual-Layer Software: Accessibility Meets Unlimited Depth

Hardware is only half the battle; software is usually where beginners get stuck. CyberBrick addresses this by offering a dual-layer software architecture, catering to absolute beginners and veteran programmers alike.

+-------------------------------------------------------------------+
|                     CYBERBRICK SOFTWARE STACK                     |
+-------------------------------------------------------------------+
|  LAYER 1: App-Based Configuration (No-Code / Plug-and-Play)      |
|  • Instant Bluetooth firmware flashing via MakerWorld App         |
|  • Pre-built UI layout for joysticks, switches, & telemetry       |
|  • One-click pairing between controller & target device           |
+-------------------------------------------------------------------+
                                  │
                                  ▼
+-------------------------------------------------------------------+
|  LAYER 2: Open MicroPython & GitHub Ecosystem (Full Customization) |
|  • Direct code editing for custom logic & automation routines    |
|  • Full access to underlying ESP32-C3 GPIO pins & communication    |
|  • Community-driven open-source code repositories                 |
+-------------------------------------------------------------------+

Layer 1: App-Based Configuration (No-Code Setup)

For users who want a seamless “print and play” experience, the CyberBrick Mobile App handles the heavy lifting. When you download a CyberBrick-verified model on MakerWorld, the app automatically pulls the corresponding control scheme and firmware.

  1. Pair your smartphone or CyberBrick remote to the target model via Bluetooth.
  2. Upload the pre-configured firmware profile with a single tap.
  3. Instantly drive, steer, or operate your creation using a digital touch interface or a physical 2.4 GHz controller.

Layer 2: MicroPython & Open-Source Code

For makers looking to push the boundaries, CyberBrick provides full open-source access via MicroPython. Creators can write custom automation logic, program autonomous sensor-driven routines, or rebind inputs directly through official GitHub repositories and developer tools.

Whether you want to build a self-balancing robot, an automated candy dispenser, or an interactive mechanical clock, MicroPython grants complete control over every pin and peripheral.

4. The Creator Ecosystem: Creator Commissions and Badging

MakerWorld isn’t just releasing hardware; they’ve built a sustainable ecosystem designed to reward 3D designers who contribute to the CyberBrick universe.

Feature / ProgramDescription & Maker Impact
Open CAD Reference ModelsBambu Lab provides downloadable STEP files and dimensional specifications for all CyberBrick electronics, enabling designers to build precise snap-fit models.
BOM IntegrationEvery CyberBrick model published on MakerWorld automatically generates a dynamic Bill of Materials (BOM) linking directly to Maker’s Supply parts.
Affiliate CommissionsCreators earn higher commission rates on CyberBrick parts compared to standard Maker’s Supply components when users buy parts through their model pages.
CyberBrick VerificationPopular models uploaded to MakerWorld enter a verification queue where top builds are physically printed, assembled, and tested by MakerWorld to receive an official “CyberBrick Verified” badge.

This closed loop creates a win-win scenario: designers are incentivized to engineer complex, functional models, and makers get access to guaranteed, high-quality projects with hassle-free hardware sourcing.

5. What Can You Build? Showcase Projects

The versatility of CyberBrick is best demonstrated by what the community and pilot creators are already building:

                     ┌──────────────────────────────┐
                     │   CYBERBRICK BUILD REALM     │
                     └──────────────┬───────────────┘
                                    │
       ┌────────────────────────────┼────────────────────────────┐
       ▼                            ▼                            ▼
┌───────────────┐           ┌───────────────┐           ┌─────────────────┐
│   RC TOYS &   │           │   COMPLEX     │           │  SMART GADGETS  │
│   VEHICLES    │           │  MACHINERY    │           │  & PRODUCTIVITY │
└──────┬────────┘           └──────┬────────┘           └────────┬────────┘
       │                           │                             │
       ├─ RC Heavy Trucks          ├─ Multi-Axis Cranes          ├─ Desk Clocks
       ├─ Construction Excavators  ├─ Robotic Arms               ├─ Macro Pads
       └─ Tracked Tanks            └─ Automated Conveyors        └─ Weather Hubs
  • Heavy Machinery & RC Vehicles: From multi-axle construction trucks to tracked tanks and forklifts, makers are building functional RC machines complete with working steering, articulated booms, and lighting packages.
  • Industrial Scale Models: Pilot designers have showcased intricate scale models, such as working Tower Cranes that utilize multi-channel motor controls to lift, rotate, and traverse loads smoothly.
  • Interactive Display Bases: Designers are creating dynamic display stands—for example, sci-fi vehicles with motorized wheel transformations (switching from drive mode to flight mode) controlled via physical switch consoles on the base.
  • Desktop Productivity: Beyond toys, CyberBrick powers smart macro pads, motorized phone mounts, custom status displays, and ambient LED controllers.

6. Step-by-Step: How to Get Started with Your First Build

Ready to dive in? Here is the typical workflow for bringing a CyberBrick project to life:

1.Select Your Project on MakerWorld:Choose a Verified Model.

Browse MakerWorld’s dedicated CyberBrick section or filter by the “CyberBrick Verified” badge. Look for a project that matches your skill level and interest, whether it’s a simple motorized gadget or a complex RC vehicle.

2.Order the BOM via Maker’s Supply:One-Click Sourcing.

Check the model’s integrated Bill of Materials (BOM). Click to add the required CyberBrick modules, motors, servos, and fasteners directly to your Bambu Lab cart.

3.Print the Structural Components:Follow Included Print Profiles.

Download the designer’s optimized print profile. Print the parts using recommended materials (PLA for general structures, TPU for tires or flexible grips, and PETG for high-stress gears).

4.Snap In the Electronics:No Soldering Required.

Assemble the mechanical frame following the designer’s assembly guide. Route pre-cut wires and snap the ESP32 compute unit, motor shield, and actuators into their designated printed slots.

5.Flash Firmware and Play:App-Based Setup.

Open the CyberBrick Mobile App, connect via Bluetooth, and flash the target firmware profile. Calibrate your joystick or control switches, and your custom creation is ready to operate!

The Future of CyberBrick and 3D Printed Robotics

CyberBrick represents a fundamental shift in desktop manufacturing. By lowering the friction between mechanical design and electronic implementation, Bambu Lab and MakerWorld are empowering a new generation of creators to build functional, intelligent hardware right at home.

As the ecosystem grows, expect to see richer sensor integrations, autonomous navigation capabilities, expanded MicroPython libraries, and an ever-growing library of community-designed blueprints. Whether you are a parent looking for an engaging STEM project with your kids, a hobbyist seeking custom RC builds, or an engineer prototyping desktop devices, CyberBrick gives you the tools to print, snap, and code your ideas into reality.

Breaking Free from Desktop CAD software

Why OnShape Is the Ultimate Tool for 3D Design Hobbyists

The hobbyist 3D printing and maker movement has exploded over the last decade. Desktops around the world are lined with fused deposition modeling (FDM) and resin printers spitting out customized brackets, intricate tabletop miniatures, replacement appliances, and custom robotics.

Yet, for many newcomers, the biggest hurdle isn’t levelling a print bed or tweaking slicer settings—it’s 3D Computer-Aided Design (CAD).

For years, entering the world of parametric 3D design meant wrestling with heavy, resource-hungry desktop software, navigating nightmare license agreements, dealing with constant crashes, or settling for oversimplified “toy” modeling apps that stall out the moment you try to design a functional, multi-part assembly.

Enter Onshape.

Developed by the original creators of SolidWorks, Onshape is a fully cloud-native, professional-grade parametric CAD platform running entirely inside your web browser. While it was built to tackle enterprise-level product development, Onshape’s generous Free Plan makes it arguably the most accessible, robust, and hassle-free choice for hobbyists getting into 3D design today.

Here is a deep dive into why Onshape is revolutionizing maker workflows and why it should be your go-to design engine.

1. Zero Installation, Zero System Overkill

Traditional CAD software is notorious for its steep hardware demands. If you’ve ever tried running legacy parametric programs on a basic laptop, you know the drill: fan noise that rivals a jet engine, massive 15 GB installation packages, and sudden freezes that obliterate an hour’s worth of work.

Onshape completely eliminates the hardware hurdle by moving the heavy computational lifting to the cloud.

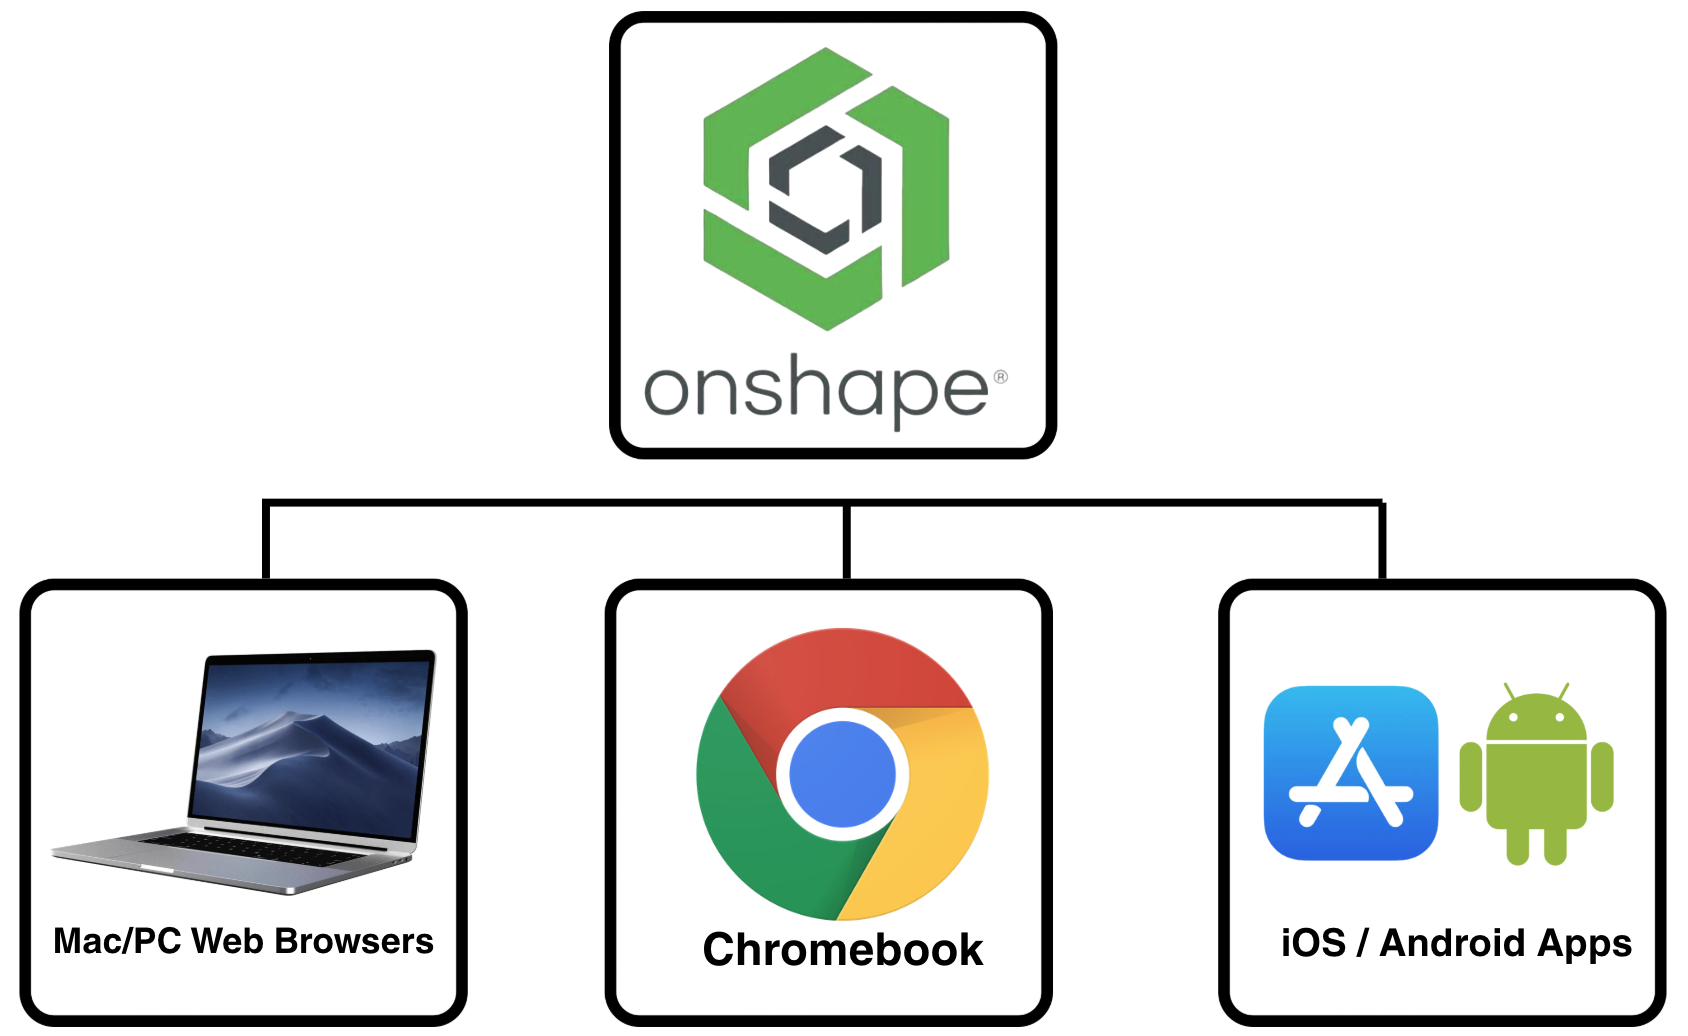
  • Runs in standard browsers: Whether you prefer Chrome, Firefox, Safari, or Edge, Onshape runs through WebGL directly in your browser window.
  • True cross-platform capability: Because it is entirely cloud-native, Onshape is platform-agnostic. It runs identically on Windows, macOS, Linux, and ChromeOS.
  • Design anywhere, on any device: You can draft complex models on a budget Chromebook at your workbench, tweak dimensions on an iPad or tablet while lying on the couch, or check design specs on your smartphone right next to your 3D printer.

There are no graphics card drivers to update, no system requirements to double-check, and no local installation files taking up drive space. If your computer can stream high-definition video, it can render 3D CAD models in Onshape.

2. Professional Parametric Modeling Without Compromise

When beginners start out in 3D design, they often start with basic mesh-based sculptors or simple block-builders. While fine for art or quick shapes, these tools quickly show their limits when you need to design mechanical parts with precise tolerances.

Onshape gives hobbyists access to genuine, industry-standard parametric modeling.

[Sketch 2D Profile with Precise Constraints] 
       ↓
[Apply Feature: Extrude / Revolve / Sweep / Loft] 
       ↓
[Parametric Feature Tree Keeps Track of History] 
       ↓
[Modify early dimensions anytime; downstream geometry updates automatically]

Key Parametric Features for Makers:

  • Fully Dimensioned Sketches: Define exact measurements in millimeters or inches, establishing geometric relations (equal length, parallel, concentric, tangent) that maintain design intent.
  • Part Studios: Unlike traditional CAD systems where every individual part must live in a separate file, Onshape utilizes Part Studios. You can design multiple related parts within the same workspace using shared sketches, making fit-together enclosures, hinges, and snap-fits infinitely easier to align.
  • Advanced Assemblies and Mates: Connect your individual parts together using high-level mates (fastened, revolute, slider, pin-slot) to simulate real-world movement and test mechanism clearance before sending anything to a 3D printer.

3. The “Never-Lose-Your-Work” Cloud Architecture

Every designer has felt the gut-punch feeling of a CAD crash wiping out hours of tedious modeling. Onshape’s fileless architecture makes that frustration a thing of the past.

The Onshape Promise: Every single click, sketch, extrude, and dimension change is saved in real time to secure cloud servers. There is no “Save” button, because you never need one.

PDM (Product Data Management) Built In

In traditional desktop programs, version management for hobbyists usually looks like a folder filled with messy filenames: Bracket_v1.stlBracket_v2_final.stlBracket_v2_FINAL_fixed2.stl.

Onshape introduces professional PDM concepts simplified for everyday use:

  1. Infinite Undo & Version History: You can roll back your project to any exact minute in its history. If a design modification breaks your geometry, you can step back to a stable point instantly.
  2. Branching and Merging: Want to test an experimental alteration to your model without ruining your main version? Create a branch! You can experiment freely, and if the change works, merge it seamlessly back into the main project trunk.

4. A Licensing Model Tailored to Open-Source Makers

Software pricing for makers can be stressful. Many commercial CAD vendors periodically restrict their free tiers for personal users—limiting the number of active documents, removing essential export formats, or putting advanced feature sets behind prohibitive subscription paywalls.

Onshape takes a transparent, open-source-friendly approach with its Onshape Free Plan:

  • Unrestricted CAD Capabilities: The core modeling tools, assemblies, and drawing generators available to commercial users are available to free tier users.
  • Public Document Model: The primary condition of the Free Plan is that all documents created are hosted publicly on the Onshape database.
  • Perfect for the Maker Culture: For hobbyists, makers, and 3D printing enthusiasts, public document storage is actually a strength. It encourages open-source hardware sharing, lets you fork community-created projects, and provides a vast library of existing parts to learn from or build upon.

If you are designing custom brackets for your home, specialized tools for your garage, or open-source 3D printer upgrades, the public storage model aligns directly with the collaborative ethos of the maker movement.

5. Instant Collaboration and Community Sharing

Designing in isolation can be tough when you run into a complex modeling issue. Onshape’s cloud environment brings modern, Google Docs-style collaboration to mechanical engineering.

  • Live Multi-User Editing: You can invite a friend, collaborator, or community member into your document simultaneously. Both of you can view, edit, and modify the model in real time, complete with live visual cues indicating where the other person is working.
  • Built-in Follow Mode: If you need help troubleshooting a feature, turn on Follow Mode. The other user sees exactly what is on your screen as you rotate, zoom, and adjust dimensions.
  • Seamless Exporting: Preparing files for slicing is effortless. Right-click any part or body, select export, and output directly to .STL.3MF, or .STEP formats with customizable tessellation controls for smooth 3D prints.

6. Customization with FeatureScript

As you grow from a beginner to an intermediate designer, you’ll find yourself performing repetitive CAD tasks: creating custom screw threads, generating parametric spur gears, modeling air vents, or cutting wire passthroughs.

Onshape tackles this with FeatureScript, the same programming language Onshape’s internal developers use to build standard modeling tools.

  • Custom Community Features: Users have created hundreds of free, open-source FeatureScript tools that integrate directly into your top toolbar.
  • One-Click Automation: Want to build a custom parametric box with interlocking finger joints for laser cutting? There’s a FeatureScript for that. Need to generate a custom thread profile or wire mesh cutout instantly? Add the script to your toolbar with a single click.

Comparing Onshape to the Competition

Feature / TraitOnshape (Free Plan)Traditional Desktop CADBasic Sculpting Tools
System RequirementsAny modern web browserHigh-end GPU & CPU neededModerate hardware requirements
Operating SystemWin, Mac, Linux, Chrome, iOS, AndroidUsually Windows-onlyWin / Mac / Mobile
File Saving & PDMAutomatic cloud saving + Version controlManual file saves; risk of corruptionManual local saving
Assembly ToolsHigh-level parametric matesVaries; often complex file linkingBasic or non-existent
CollaborationReal-time multi-user editingFile sharing / email back-and-forthFile export/import only
Learning CurveModerate (Structured learning center)SteepLow to Moderate

How to Get Started with Onshape Today

If you’re ready to step up your 3D design game, setting up your workspace takes under two minutes:

  1. Sign Up: Visit Onshape’s website and register for an Onshape Free (Personal / Maker) account.
  2. Explore the Learning Center: Onshape provides exceptional, self-paced interactive learning courses. Start with the CAD Basics and Part Design pathways to learn sketch constraints, dimensions, and feature generation.
  3. Inspect Community Models: Search the public directory for existing 3D printer parts or simple designs. Copy a document into your workspace to explore its feature tree and see how experienced makers construct their geometry.
  4. Design Your First Functional Print: Start small—a custom battery holder, a wall mount for a remote control, or a simple replacement knob—and experience the satisfaction of printing a part designed to your exact specifications.

Final Thoughts

The era of lost work, corrupted files, and system-crashing CAD software is fading fast. By bringing enterprise-grade parametric modeling into a seamless, cloud-native browser application, Onshape has broken down the barriers that kept everyday creators from mastering custom hardware design.

Whether you’re building combat robotics, designing custom enclosures for electronics projects, or simply making practical repairs around the home, Onshape delivers the power, flexibility, and reliability you need to turn digital concepts into physical reality.

Why the Bambu Lab A1 Mini is the Ultimate Beginner 3D Printer

For years, getting into 3D printing felt less like starting a fun creative hobby and more like taking on an unpaid job as a mechanical technician.

If you bought an entry-level 3D printer a few years ago, your first weekend wasn’t spent bringing digital 3D models to life—it was spent deciphering vague assembly manuals, manually leveling a metal bed with a piece of paper, and endlessly tuning software settings just to stop a plastic blob from ruining your print bed.

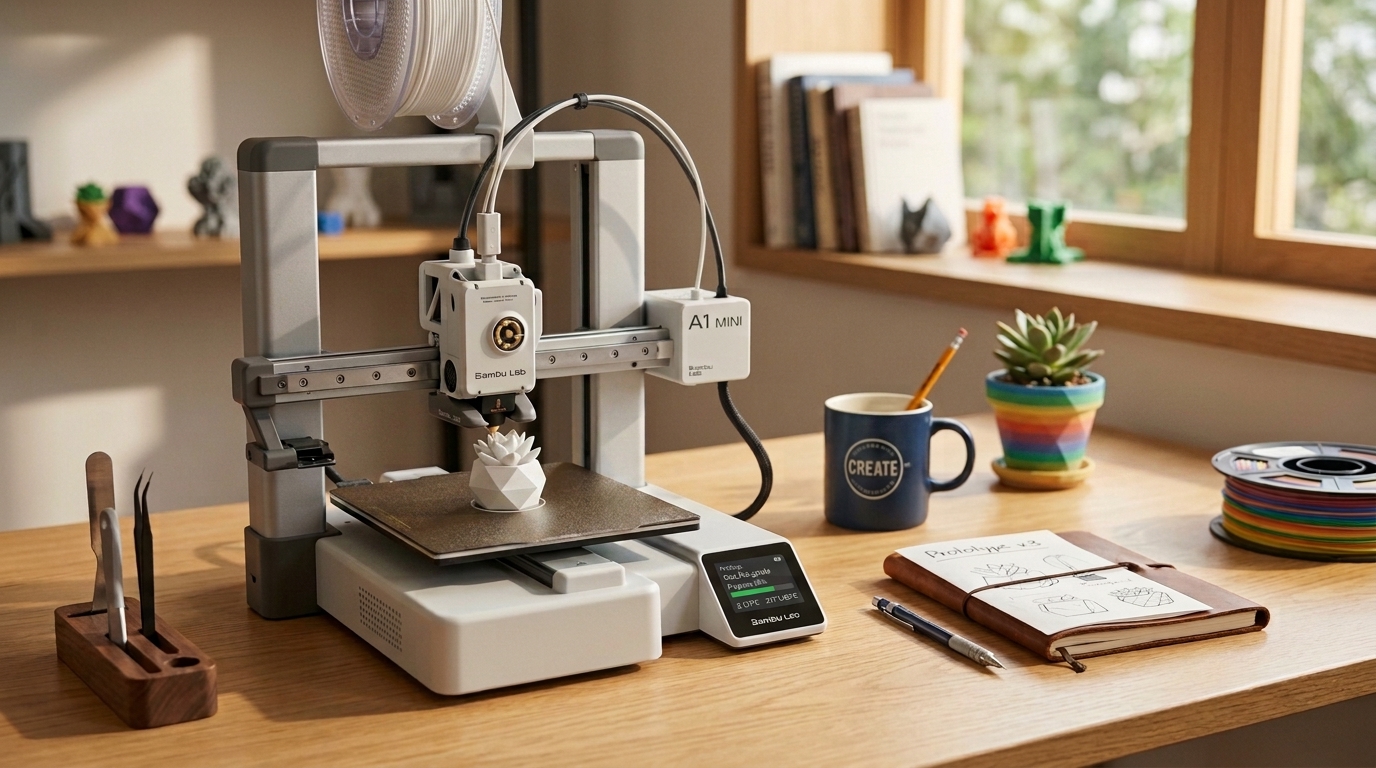
Then came the Bambu Lab A1 Mini. By eliminating the frustrating, technical friction points that used to scare newcomers away, the A1 Mini has turned 3D printing into what it always should have been: a seamless, plug-and-play creative outlet.

Gambody+ 1

Here is why the Bambu Lab A1 Mini stands unchallenged as the single best 3D printer for beginners.

YouTube

1. True Plug-and-Play Experience

The biggest barrier to entry in 3D printing has always been assembly and setup. Older budget printers arrived as flat-packed DIY kits requiring hours of assembly, precise square frame alignment, and nerve-wracking wiring setups.

The A1 Mini completely flips this script:

  • 15-Minute Setup: The machine arrives pre-assembled in the box. All you need to do is remove a few transit screws, attach the spool holder, plug it in, and turn it on.3D Protofarm
  • Guided Setup Wizard: The crisp, full-color touchscreen guides you step-by-step through the initial connection and self-test.

Within 20 minutes of opening the shipping box, you can realistically be printing your very first 3D object.

2. Zero-Tuning Reliability: Automated Everything

Ask any experienced 3D printing veteran what causes the most failed prints, and they will tell you two things: poor bed leveling and incorrect flow calibration. The A1 Mini solves both automatically before every single print job.

Butter, What?!+ 1

Automatic Bed Leveling (ABL) & Z-Offset

Traditionally, users had to turn knobs under the print bed while sliding a piece of printer paper back and forth to judge nozzle height by feel. The A1 Mini uses its nozzle as an absolute distance probe. It probes the flexible PEI bed across a mesh grid to measure tiny height deviations, guaranteeing a rock-solid, glass-smooth first layer every single time without manual intervention.

Dynamic Flow Rate & Vibration Compensation

  • Active Flow Compensation: Equipped with an eddy-current sensor in the toolhead, the A1 Mini measures pressure inside the hotend in real-time, automatically adjusting plastic extrusion for razor-sharp corners and smooth walls.
  • Vibration Suppression (Input Shaping): Before printing, the machine shakes its axes to measure resonance frequencies, automatically adjusting motor timing so prints stay crisp even at blistering speeds.

3. High-Speed Printing Without the Headache

In the past, budget printers ran at slow, agonizing speeds (typically 40–50 mm/s) to maintain quality. A simple phone stand could easily take 6 to 8 hours to finish.

The Bambu Lab A1 Mini prints at top speeds up to 500 mm/s with an acceleration of 10,000 mm/s².

Gambody

Printer MetricTypical Older Budget PrinterBambu Lab A1 Mini
Max Print Speed50–60 mm/sUp to 500 mm/s
Setup Time2–4 Hours15–20 Minutes
Bed LevelingManual (Paper method)100% Fully Automatic
Nozzle SwapsMulti-tool / Hot-tighteningToolless Quick-Swap Mechanism
App EcosystemThird-party setup / SD CardsBambu Handy (One-click print)

What used to be an overnight wait is now a 45-minute print you can complete before heading out the door. Faster prints mean faster feedback loops, letting beginners experiment, learn, and iterate rapidly without losing patience.

4. The Ecosystem: Bambu Studio & Bambu Handy

Hardware is only half the battle; software is where many beginners get stuck. Traditional “slicers” (the programs that prepare 3D files for printing) are filled with hundreds of confusing settings like retract distances, jerk rates, and temperature curves.

Bambu Lab solves this with an intuitive software ecosystem:

Gambody

[ MakerWorld Model Repository ] 
               │
               ▼
   [ Bambu Handy Mobile App ]
               │
               ▼ (Wi-Fi Print)
     [ Bambu Lab A1 Mini ]
  1. MakerWorld Integration: Bambu’s model community lets you search thousands of free, pre-tested models directly from your smartphone or computer.
  2. One-Click Mobile Printing: Through the Bambu Handy app, you can choose a model, hit “Print,” and monitor the progress via the built-in camera without touching a single slice setting or transferring files onto an SD card.
  3. Bambu Studio Desktop: When you are ready to dive deeper into custom print slicer settings, Bambu Studio provides tuned default profiles for every popular filament type.

5. Easy Multi-Color Printing with AMS Lite

Multi-color 3D printing used to require multi-thousand-dollar industrial setups or complex, prone-to-jamming aftermarket upgrades.

The A1 Mini can be bundled with the AMS Lite (Automatic Material System).

3D Protofarm

Why AMS Lite is a Game Changer for Beginners: It allows you to load up to four spools of filament simultaneously. The printer automatically switches colors mid-print, allowing you to create multi-colored toys, detailed display figures, and sharp multi-toned signs without needing to manually stop and swap spools.Even if you stick to single-color prints, the AMS Lite acts as an automatic filament backup, switching spools seamlessly when one runs out mid-print!

Gambody

6. Smart Safety & Beginner-Friendly Maintenance

Beginners often worry about safety and printer maintenance. The A1 Mini incorporates several smart safeguards designed for peace of mind:

  • Quick-Swap Nozzles: Swapping a clogged or worn nozzle on older printers involved heating the toolhead to 250°C and using wrenches. On the A1 Mini, a quick-release clip lets you swap nozzles in under 30 seconds without tools or hot surfaces.Gambody
  • Tangle & Filament Detection: If your spool tangles or runs out, the printer automatically pauses, saves its position, and alerts your phone instead of wasting plastic or ruining a half-finished object.
  • Quiet Operation: Thanks to active motor noise canceling, the A1 Mini runs quietly in the background, making it well-suited for apartments, home offices, bedrooms, or classrooms.3D Protofarm

What are the Limitations?

To give an honest assessment, no printer is perfect for every scenario. There are two main trade-offs to keep in mind:

3dprotofarm.in

Build Volume (180 × 180 × 180 mm)

The “Mini” moniker is accurate. The build volume is smaller than standard 220 mm square printers. If your main goal is printing full-sized wearable cosplay helmets or large one-piece props, you will either need to cut models into smaller sections or opt for the larger Bambu Lab A1. However, for desk accessories, miniatures, organizers, brackets, and functional tools, 180 mm is more than enough space.

Open-Frame Construction

The A1 Mini is an open-style printer. This makes it ideal for printing standard consumer materials like PLAPETG, and TPU. However, it is not suited for high-temperature engineering plastics like ABSASA, or Nylon, which require an enclosed chamber to prevent warping.

3D Protofarm+ 1

The Verdict: The Ideal Gateway into 3D Printing

The Bambu Lab A1 Mini isn’t just a great printer for its low price—it’s a landmark machine that fundamentally changes who can participate in 3D printing. By shifting the focus away from machine troubleshooting and back toward pure creativity, it lets you spend your time designing, downloading, and printing rather than tinkering with wrenches and calipers.

Butter, What?!

If you want an affordable, fast, reliable 3D printer that “just works” out of the box, the Bambu Lab A1 Mini is the easiest choice you will ever make.

Everyone is an Artist, No One is Listening

The Double-Edged Sword of AI Creativity

Not long ago, the path to becoming a recognized creative was guarded by formidable gates. If you wanted to make a film, you needed thousands of dollars in camera gear, lighting, and editing suites, not to mention a crew. If you wanted to produce an album, you needed to master complex music theory, learn an instrument, or pay rent-mortgaging prices for studio time. If you wanted to paint, you needed years of fine-motor practice to make the canvas match the vision in your head.

Today, those gates have not just been opened; they have been vaporized.

With tools like Midjourney, ChatGPT, Suno, and Sora, anyone with an internet connection and an imagination can generate a gallery-quality digital painting, a fully produced synth-pop track, a polished essay, or a cinematic video sequence in seconds.

We are living in the golden age of creative democratization. But this unprecedented access has triggered an equally powerful counter-force: hyper-saturation.

When everyone possesses the power to create instantly, the world is suddenly flooded with an ocean of content. We find ourselves trapped in a fascinating, exhausting paradox: it has never been easier to make art, and it has never been harder to get anyone to care about it.

For seasoned professionals and aspiring “want-to-be” creatives alike, this shift is simultaneously a massive win and an existential loss.

Part I: The Great Win — Democratizing the Human Imagination

To understand the beauty of this transition, we must first look at what generative AI actually does: it bridges the gap between intent and execution.

For centuries, human creativity has been limited by technical execution. Millions of brilliant stories have died in the minds of people who lacked the grammatical polish to write a novel. Spectacular visual worlds have remained locked inside the imaginations of those who couldn’t draw a straight line.

AI acts as a cognitive prosthesis. It takes the spark of an idea the prompt and handles the labor of translating it into a medium.

1. Empowering the “Want-to-Be” Creative

For the hobbyist, the dreamer, or the person who was told in middle school that they “weren’t the artistic type,” generative AI is a revelation. It is an invitation back into the playground of self-expression.

  • A game designer who can’t draw can now sketch out concept art to pitch their indie game.
  • A poet who doesn’t know how to read sheet music can hear their words sung by an AI-generated choir.
  • A small business owner can craft a beautiful brand identity without a multi-thousand-dollar marketing agency budget.

This is a profound human victory. It removes the physical and financial barriers to self-expression, proving that creativity is not a specialized genetic trait reserved for a chosen few, but a fundamental human drive.

2. The Rise of the “Centaur” Creator

Even for established professionals, AI has supercharged the ideation phase. Writers use LLMs to break writer’s block, brainstorming plot points or generating character names. Illustrators use image generators to rapidly prototype layouts and color palettes before putting digital pen to paper.

This human-AI collaboration often referred to in tech circles as “centaur writing” or “centaur designing” allows creators to operate at a higher level of abstraction. Instead of spending hours meticulously rendering a shadow, they can spend that time thinking about the deeper concept, the emotional resonance, and the narrative arc.

Part II: The Great Loss The Sea of Noise and the Death of Scarcity

However, every technological revolution has a price. When you make the cost of producing something zero, its economic and psychological value behaves accordingly.

In economics, when supply becomes infinite, the value of an individual unit trends toward zero. This is the crisis of the creative saturation age.

Low Barriers to Entry ➔ Explosion of Creators ➔ Infinite Content Supply ➔ Collapse of Audience Attention

1. The Death of Scarcity and “Aesthetic Fatigue”

When beautiful things are difficult to make, we value them. When we look at a Renaissance painting or listen to a complex orchestral movement, we are appreciating two things simultaneously: the beauty of the piece, and the immense human sacrifice, time, and mastery required to build it.

AI removes the signal of effort. When an image that would have taken an artist three weeks to paint can be generated in four seconds, the magic evaporates. We look at a breathtakingly detailed image on our social media feeds, register that it’s “AI-generated,” and swipe past it in a millisecond. We are suffering from aesthetic fatigue. When everything is stunning, nothing is.

2. The Cacophony of the Feed

If anyone can create a polished piece of media in seconds, then everyone is.

Streaming platforms, social media feeds, and self-publishing storefronts are being buried under an avalanche of synthetic content. Spotify is flooded with thousands of AI-generated ambient tracks; Amazon’s Kindle store is inundated with low-effort, AI-written e-books; YouTube is packed with automated “faceless” channel videos generated from text prompts.

For the genuine “want-to-be” creative who has finally found their voice, this is a tragedy. They have finally acquired the tools to create, but they are shouting into a hurricane. The chances of their work being discovered, read, heard, or appreciated by another human being have plummeted.

Part III: The Professional Crisis The Devaluation of Craft

For those who earn their living through creative pursuits, the democratization of creativity feels less like a liberation and more like an eviction.

Traditional Creative Value:
[Technical Skill + Unique Vision] ➔ [Value to Clients/Audience]

The AI Disruption:
[AI Tool + Anyone's Prompt] ➔ [Sufficiently Good Output] (Bypassing Technical Skill)

The professional market is dividing into a brutal hierarchy:

1. The Collapse of the “Good Enough” Economy

Much of the creative economy does not rely on high art; it relies on “good enough” commercial art. This includes corporate copy, stock photos, background music for corporate videos, simple website designs, and basic illustrations.

This entire tier of the creative economy is being hollowed out. Clients who used to hire freelance writers or junior designers for $500 a project are now using subscription-based AI tools for $20 a month. While the AI output might not be a masterpiece, to the cost-conscious business owner, it is “good enough.”

This robs young, aspiring creatives of the very entry-level gigs they need to build their portfolios, hone their skills, and transition into true masters of their craft.

2. The Psychological Toll of the “Prompter”

There is a distinct psychological difference between making something and ordering something.

Traditional creativity is therapeutic because of the process. The physical act of painting, the struggle of rewriting a sentence, the physical muscle memory of playing a guitar chord, these acts trigger flow states, discipline, and emotional processing.

When creativity is reduced to prompting, we transition from creators to curators or consumers. We stand at a buffet, pointing at what we want, but we lose the spiritual connection that comes from cooking the meal ourselves. For many creatives, this shift feels hollow, leaving them feeling less like artists and more like software operators.

Part IV: The Future of Creativity How to Survive the Saturation

If we cannot stop the tide of AI content, how do human creators, both professional and amateur, survive and find meaning in this new landscape?

The answer lies in leaning into the things that AI cannot replicate: context, community, and friction.

Creative Element | AI Output | Human Creator | | Production Speed | Instantaneous, high volume | Slow, deliberate, limited | | Core Source | Pattern recognition & statistical averages | Lived experience, trauma, joy, and physical limits | | Relationship | Transactional (tool to user) | Empathetic (human to human) | | Value Driver | Convenience and low cost | Authenticity, story, and effort |

1. The Premium on “Proof of Human”

As the digital space becomes increasingly synthetic, audiences will begin to crave “Proof of Human” (PoH). We will see a massive resurgence in the value of:

  • The physical and tactile: Vinyl records, physical books, hand-painted canvases, live theater, and acoustic, unedited music performances.
  • The flawed and imperfect: The slight tremor in a singer’s voice, the visible brushstroke, the quirky, non-linear logic of a human essayist. These “mistakes” are the fingerprints of humanity.
  • The “Behind the Scenes”: Audiences will care more about how something was made. Documenting the creative process, the blood, sweat, tears, and mistakes, will become more valuable than the finished product itself.

2. Building Niche Communities

When discovery algorithms are broken by the sheer volume of content, mass-market appeal will die. The future of creative sustainability lies in building small, hyper-dedicated, trust-based communities.

A creator does not need a million casual algorithmic impressions; they need 1,000 true fans who value their unique perspective, write back to their newsletters, attend their live shows, and buy their physical creations because they feel a genuine human connection.

Conclusion: The New Renaissance or the Great Flattening?

AI has not killed creativity, nor has it solved it. It has simply decoupled creativity from craft.

For the “want-to-be” creative, it is an unparalleled gift, a magic wand that allows them to play in the sandbox of art without the gatekeepers of technical skill standing in their way.

For the professional creative, it is an existential challenge that demands a pivot away from mere technical production and toward deep authenticity, storytelling, and human connection.

Ultimately, the future of art will not be decided by what machines can make, but by what humans choose to value. In an ocean of infinitely generated, perfectly polished pixels and prose, we will find ourselves searching not for the prettiest picture, but for the human hand reaching out from the other side of the screen.

Digital Based Hobbies

Weighing the Pros and Cons of Screen-Based Hobbies

There was a time when picking up a hobby meant buying a metric ton of stuff. If you wanted to get into woodworking, your garage suddenly belonged to a table saw. If you took up oil painting, your spare bedroom smelled like turpentine for a month. If you collected comic books, your living room was slowly eaten by longboxes.

Today, things look a little different. Millions of people are finding their creative fulfillment, intellectual stimulation, and weekend relaxation entirely behind a screen. From digital illustration and music production to coding, video editing, 3D modeling, and gaming, the landscape of leisure has gone thoroughly digital.

Like anything else in the modern tech era, transitioning our passions to pixels comes with massive wins and a few sneaky drawbacks. Let’s dive into the ultimate pros and cons of digital-based hobbies to see how they stack up against their analog ancestors.

The Pros: Why the Digital Shift is a Game-Changer

There’s a reason millions of people are trading in their paintbrushes for styluses and their physical novels for e-readers. Digital hobbies offer an unprecedented level of freedom that physical hobbies simply can’t match.

1. Unrivalled Accessibility: The Ultimate Level Playing Field

The absolute best thing about digital hobbies is their low barrier to entry. In the analog world, trying something new usually requires a significant financial investment before you even know if you like it. Want to try pottery? You need to find a studio, pay for classes, and buy clay.

In the digital world, your entry ticket is often an internet connection and a device you already own.

  • Free and Freemium Software: You can learn industry-standard skills without spending a dime. Want to learn 3D modeling? Blender is completely free. Want to learn vector design? Inkscape or Figma have you covered. Want to produce music? GarageBand or Cakewalk are ready to go.
  • The World’s Biggest Classroom: Thanks to platforms like YouTube and Reddit, the learning curve has been obliterated. If you hit a wall while learning to code or edit a video, a quick search will yield a thousand 10-minute tutorials explaining exactly how to fix it.
  • The “Undo” Button (Ctrl+Z): This is perhaps the greatest accessibility feature of all time. In a digital hobby, mistakes are free. If you mess up a line in a digital drawing, you press a hotkey. If you mess up a stroke on a physical canvas, you might have just ruined hours of work. Digital hobbies allow for rapid experimentation because the fear of failure is entirely removed.

2. Space? What Space? (The Minimalist’s Dream)

Let’s face it: modern living spaces aren’t getting any bigger. If you live in a city apartment, dedicating an entire room or even an entire table to a hobby is a luxury you might not have.

Digital hobbies are a masterclass in spatial efficiency.

The Setup: A laptop, a desk, a comfortable chair, and maybe a peripheral or two (like a drawing tablet or a MIDI keyboard).

That’s it. You can be an aspiring music producer, a novelist, a digital painter, and a hardcore gamer all from the exact same 4-foot piece of IKEA furniture. When you’re done for the night, you don’t have to spend 20 minutes cleaning up scraps of paper, wiping down brushes, or packing away heavy tools. You close the laptop lid, and your room is instantly clean. It’s a minimalist’s dream and a massive win for anyone looking to keep clutter at bay.

The Cons: The Hidden Toll of the Screen

While the digital world gives us endless possibilities, it also takes a toll on our bodies and minds if we aren’t careful. The very things that make digital hobbies convenient can also make them draining.

1. The Sedentary Trap: Too Much Sitting

We already sit too much. Most of us spend eight hours a day hunched over a keyboard for work or school. When our hobbies also require us to sit in front of a screen, we end up spending the vast majority of our waking hours completely stationary.

  • Physical Strain: The human body wasn’t designed to stare at a glowing rectangle for 14 hours a day. Digital hobbies often bring a host of physical ailments: eye strain, lower back pain, tight hips, and the dreaded carpal tunnel syndrome.
  • The Lack of Kinetic Joy: There is a visceral, physical joy in analog hobbies the smell of sawdust, the feeling of clay sliding through your fingers, the physical exhaustion after a hike. Digital hobbies completely detach us from our physical environment, leaving us entirely in our heads.

2. The Distraction Engine: A Million Tabs Open

When your hobby takes place on the exact same device where you check your email, read the news, and scroll social media, focus becomes a premium commodity.

It is brutally easy to get distracted during a digital hobby. You might open up your video editing software with every intention of working on your project, but then a Discord notification pops up. You click it. Someone shared a link to a YouTube video. You watch it. Suddenly, an hour has passed, your editing timeline is blank, and you’re deep down a rabbit hole about the history of competitive Tetris.

Physical hobbies inherently force a degree of presence. If your hands are covered in oil paint or you are holding a chisel, you physically cannot pick up your phone to check Twitter every two minutes. Digital hobbies require an immense amount of discipline to maintain a true “flow state.”

3. The Dopamine Void: Lacking a Sense of Accomplishment

This is a subtle, psychological con, but it’s one that many digital hobbyists struggle with without even realizing it. Sometimes, digital hobbies can leave you feeling empty, resulting in a lack of a tangible sense of accomplishment.

When you finish a physical project say, a knitted scarf or a restored piece of furniture it exists in the real world. You can hold it. You can set it on a shelf. Your brain registers its physical presence as proof of your labor.

Analog:  [Hours of Work] ──> [Physical Object] ──> [High Tangible Satisfaction]
Digital: [Hours of Work] ──> [File.mp4 on Disk] ──> [Abstract/Fleeting Satisfaction]

When you spend 30 hours coding a small app or rendering a digital landscape, your final product is ultimately just a collection of 1s and 0s on a hard drive. If your computer is off, your hobby effectively ceases to exist. Because the output is abstract, our brains sometimes fail to give us that deep, satisfying hit of dopamine that comes from creating something we can physically touch. It can make the time spent feel less “real” or less valuable, leading to a strange sense of hobby burnout.

Finding the Sweet Spot: How to Balance the Digital Lifestyle

Does the dark side of digital hobbies mean you should throw your PC in the trash and take up blacksmithing? Absolutely not. It just means you need to be intentional about how you engage with your screen-based passions.

Here are a few ways to maximize the pros while neutralizing the cons:

Upgrade Your Ergonomics

If you’re going to sit, sit right. Invest in a high-quality ergonomic chair, or better yet, a standing desk. Use tools like the 20-20-20 rule (every 20 minutes, look at something 20 feet away for 20 seconds) to protect your eyes.

Create a “Hobby Mode” on Your Devices

Use app blockers or separate user profiles on your computer to lock out social media and work emails when you are in your creative zone. Treat your digital hobby time with the same sacred focus you would give a physical workshop.

Bring the Digital into the Physical World

Bridge the gap to fight off the lack of accomplishment. If you do digital art, print your favorite pieces on high-quality canvas and hang them up. If you write, print and bind a physical copy of your short stories. If you code a game, host a game night and watch your friends play it in person. Making the digital tangible does wonders for your mental satisfaction.

The Verdict

Digital-based hobbies are one of the greatest gifts of the modern age. They have democratized creativity, allowed people in tiny spaces to build massive worlds, and given us tools that our ancestors could only dream of.

They aren’t perfect they demand our attention, chain us to chairs, and can sometimes feel fleeting. But with a little mindfulness, proper ergonomics, and a dedication to focus, the digital world can become your ultimate playground.

What digital hobby are you looking to dive into next? Do you find it harder to stay focused when staring at a screen compared to working with your hands?

Volume Three

On the winter solstice, Gerald reflects on the shortest day of the year and the turning point it represents. He describes the town of Snorewood, its people, and their routines, focusing on the Drowsy Bean coffee shop and Bev’s Books. Gerald highlights the December shelf at Bev’s Books, a curated selection of eight books that Bev believes capture the essence of the season.

Gerald reflects on his unfinished book about ordinary evenings and Bev’s decision to put his self-published book about Snorewood on the shop shelf. Priya, at the Steady Ground studio, celebrates the last class of the year with her students, appreciating the right moment. Doug, at the pier, establishes a new category for rating ice, finding beauty in the thin, clear December ice.

Gerald finishes the first draft of his book about the history of ordinary evenings in Snorewood. He reflects on the significance of capturing the seemingly mundane details of life, which are true and worth noticing. The book is complete, capturing the essence of the town and its people, and Gerald shares the final sentence with Bev, who confirms it is the right ending.

Gerald finished the first draft of the history of ordinary evenings, a 311-page book, and shared the last sentence: “And the evening continued.”

November

In Snorewood, November is a distinct season characterized by its early darkness, cool weather, and the absence of tourists. The town embraces the season, with residents finding warmth and comfort in coffee shops, reading, and the familiar rhythms of daily life. The episode follows Priya, Bev, and Maureen as they navigate their evenings, highlighting the unique atmosphere and sense of community that November brings to Snorewood.

Maureen, a barista, prepares a special latte for Franklin, a high school English teacher, acknowledging the significance of November and the importance of consistency in certain things. Meanwhile, Doug, a regular at the coffee shop, visits the pier in the November rain, reflecting on the lake’s true nature and correcting his previous underestimations of its beauty and significance. He revises his notebook entries, changing the colour rating of the November lake from four to seven, acknowledging its true value.

Nik reflects on his life in Snorewood, finding contentment in the ordinary moments, like sitting on a bench in the rain. He realizes that the town, with its people and the lake, is already complete and that he is part of that completion. Maureen, at the Drowsy Bean, decides to keep a painting on display, acknowledging its significance beyond its monetary value.

Snorewood is enveloped in November darkness, with residents engaged in their evening routines. Bev reads Gilead, Doug corrects his notebook, Priya enjoys dinner with her family, and Terry reviews a proposal. Nik, on the waterfront bench, experiences the lake’s true essence, realizing its November beauty is a seven, not the four Doug had recorded.

Nik’s Mother

Nik’s mother, Vera Petrov, arrives in Snorewood to visit her son. She arrives at the farmers market early, exploring the stalls and buying butter tarts from Gabrielle, who recognizes her as Nik’s mother. Vera enjoys the butter tarts, appreciating the slower pace of life in Snorewood and understanding why Nik enjoys it there.

Nik brings his mother, Vera, to Snorewood to help her relax and enjoy life. They visit the Drowsy Bean, where Vera meets Maureen and enjoys a unique drink. They then go to the beach, where Vera meets Doug, the lake-watcher, and decides to join him that evening. Finally, they visit Bev’s Books, where Vera finds a book she’s been searching for and enjoys the shop’s atmosphere.

Vera visits a small town and meets Doug, who rates the lake’s colour, choppiness, smell, and overall experience every evening. She joins him at the pier, observing his methodical approach and learning about his commitment to the ritual. Inspired by Doug’s dedication, Vera rates the lake herself, finding it “honest” and giving it an eight, a first-time rating that reflects her unique experience.

Vera Petrov visits Snorewood, spending time with her son Nik and his friends. She experiences the town’s “honesty” and starts a journal, inspired by the ordinary evenings she observes. The episode ends with a shared appreciation for the town and its people, as they reflect on the significance of seemingly ordinary moments.

The bench

The episode begins with a description of the town’s farmers market on a May morning, highlighting the familiar sights and sounds. The focus then shifts to Nik’s interactions with Gabrielle at the Ouellette booth, showcasing a growing warmth between them.

Maureen creates a new spring drink called “May” at The Bean, capturing the feeling of relief from winter. The drink is a hit, selling out quickly. Priya reflects on the growth of her yoga studio, appreciating the progress and the support from Marcus. Bev curates a May-themed book shelf at her bookstore, featuring books about paying attention, and helps a customer find a new read.

A plaque was unveiled on a waterfront bench, commemorating the lake’s beauty. The plaque reads, “Nothing worth noticing happens only once. This is where we pay attention.” The unveiling was attended by a small group, including the bench’s designer, Terry, and Bev, who had a personal connection to the bench. Doug, a regular observer of the lake, rated the May lake’s colour, choppiness, and smell, finding it a returning seven, a sign of the beginning of something new.

The episode concludes with a focus on the May lake and a bench with a plaque that reads, “Nothing worth noticing happens only once. This is where we pay attention.” The characters reflect on the significance of ordinary moments and the importance of paying attention to the world around them. The episode ends with a sense of continuity and a promise to return to Snorewood.

The Apple Magic Mouse, an Ergonomic Outcast

Why the Apple Magic Mouse Is Apple’s Most Underrated Accessory

In the pantheon of Apple hardware, certain products are universally canonized. The iPhone redefined modern communication. The MacBook Air reshaped personal computing. The AirPods turned wireless audio into a ubiquitous fashion statement.

And then, there is the Apple Magic Mouse.

If you spend any time in tech forums, YouTube comment sections, or graphic design subreddits, you will find a relentless stream of vitriol aimed at this sleek little slab of aluminum and acrylic. It is routinely mocked for its unorthodox ergonomics and vilified for its charging port placement. To the vocal majority, it represents a rare instance of Apple prioritizing form over function.

But here is a counter-intuitive truth: The Magic Mouse is one of the most misunderstood, brilliant, and underrated accessories Apple has ever created. When used the way Apple actually intended, it isn’t an ergonomic nightmare—it’s an efficiency powerhouse. By bridging the gap between a traditional mechanical mouse and the multi-touch fluidity of a trackpad, the Magic Mouse offers a workflow experience that no other mouse on the market can replicate.

The Real Reason People Hate It: The Charging “Flaw”

Before we can appreciate the genius of the Magic Mouse, we have to address the elephant in the room: the charging port.

Since its redesign as the Magic Mouse 2, the charging port has lived on the bottom of the device. This means that when the mouse is charging, it must lie on its back like a helpless, flipped turtle, rendered completely useless. On paper, it looks like an egregious design failure. Tech reviewers have had a field day with it for years.

But let’s look at the actual math of using this device:

  • The Battery Life: A single charge lasts between one to two months depending on usage.
  • The Quick Charge: Plugging the mouse in for just two minutes gives you enough battery life to get through a full 8-hour workday.
  • The Reality Check: You only need to flip the turtle 6 to 12 times a year. You can do it while making coffee, taking a lunch break, or stepping away from your desk.

By placing the port on the bottom, Apple preserved the unbroken, seamless aesthetic of the top shell. While it violates the traditional rule of “plug-in-and-use-while-charging,” it forces a clean design that is entirely unencumbered by a front-facing cable socket that would otherwise collect dust and ruin the mouse’s sleek silhouette. It is a compromise, yes, but one whose real-world inconvenience is wildly blown out of proportion.

You’re Holding It Wrong: The Ergonomic Misconception

The most common complaint levelled against the Magic Mouse is that it causes hand cramps because it is “too flat.” Traditional ergonomic mice, like the Logitech MX Master series, feature a high, contoured arch designed to support the entire palm of your hand.

When users approach the Magic Mouse with a traditional “palm grip”—attempting to rest the meat of their hand flat against the surface—they inevitably experience discomfort. Their fingers are forced into unnatural angles, and their wrist drags across the desk.

The Secret: The Magic Mouse is not designed for a palm grip. It is designed for a fingertip grip.

When you use a fingertip grip, your palm hovers completely above the mouse. Your thumb rests on one aluminum sidewall, and your ring and pinky fingers rest on the other. Your index and middle fingers float lightly over the glass surface.

Once you adopt this posture, the Magic Mouse makes perfect sense. You aren’t moving the mouse with your entire forearm; you are micro-manipulating it with the tips of your fingers. This gives you an astonishing amount of precision and, crucially, clears the top surface of the mouse so your fingers can perform its true superpower: gestures.

The Superpower: A Trackpad Disguised as a Mouse

What makes the Magic Mouse genuinely underrated is that people treat it like a standard point-and-click mouse, ignoring the fact that the entire top surface is a giant, seamless multi-touch trackpad.

Apple’s macOS is deeply built around trackpad gestures. Features like Mission Control, App Exposé, and fluid horizontal scrolling are core to navigating the operating system efficiently. If you use a traditional mouse from a third-party manufacturer, you lose that native fluid integration. You are forced to rely on clunky scroll wheels and side buttons mapped to keyboard shortcuts.

The Magic Mouse gives you the best of both worlds: the targeted physical precision of an optical mouse, combined with the gesture-based speed of the Magic Trackpad.

The Power-User Gesture Suite

  • 360-Degree Inertial Scrolling: Traditional mouse wheels move strictly up and down, often in rigid, notched increments. The Magic Mouse allows you to scroll in any direction—up, down, left, right, and diagonally—with pixel-perfect smoothness. If you are a video editor scrubbing through a massive timeline, or a data analyst navigating a massive Excel spreadsheet, this feature alone is a game-changer.
  • Swipe to Navigate: A simple, one-finger horizontal swipe lets you flip between pages in Safari or documents in Preview as if you were turning pages in a book.
  • Double-Tap for Mission Control: A gentle double-tap with two fingers instantly zooms out to show you every open window on your Mac. No searching for shortcuts, no hitting the keyboard—just a seamless fluid transition.
  • Spaces Swiping: A two-finger horizontal swipe lets you glide effortlessly between full-screen apps and multiple desktop spaces.

When you master these gestures, navigating macOS becomes incredibly fast. Your hand barely moves; your fingertips simply dance across the surface of the mouse, manipulating your digital workspace with unmatched speed.

Unmatched Build Quality and Minimalism

In a market saturated with chunky plastic mice covered in rubber grips that inevitably degrade and get sticky over time, the Magic Mouse stands alone as a marvel of industrial design.

It is constructed from a solid block of aluminum and a single piece of polished acrylic. There are no seams to collect dirt, no rubber elements to wear away, and no intricate crevices that require cleaning with a toothpick. It is remarkably durable, lightweight, and incredibly easy to clean.

Furthermore, from a purely aesthetic standpoint, it is a minimalist masterpiece. Whether sitting next to a Studio Display, an iMac, or a docked MacBook, it complements Apple’s design language perfectly. It takes up minimal physical space on a desk and slides easily into a laptop sleeve without creating an awkward bulge, making it an excellent travel companion for mobile professionals.

Who Is the Magic Mouse For?

To say the Magic Mouse is underrated is not to say it is perfect for everyone. It is a specialized tool optimized for a specific ecosystem and workflow.

Best Suited ForNot Ideal For
Creative Professionals: Video editors (Final Cut, Premiere), audio engineers (Logic Pro), and graphic designers who rely heavily on horizontal timelines and canvas panning.Hardcore Gamers: First-person shooters and competitive games require distinct physical left/right switches and high-DPI hardware buttons that the Magic Mouse isn’t built for.
General Productivity Power-Users: Anyone who heavily utilizes macOS Spaces, Mission Control, and web navigation.Users with Chronic Wrist Issues: Those who require intense orthopedic support or prefer a vertical mouse layout.
Minimalist Aesthetic Enthusiasts: Users who want a clean, wireless, cable-free desk setup.Windows Users: While it can work on PC with third-party drivers, you lose the native gesture support that makes it magical.

The Verdict: A Masterpiece in Hiding

The Apple Magic Mouse is often judged by the standards of a world it doesn’t belong to. If you judge it as a traditional mechanical mouse meant to be gripped tightly and dragged across a pad for gaming, it fails.

But the Magic Mouse isn’t a traditional mouse. It is a multi-touch input surface on wheels.

It requires a slight learning curve—a shift from a heavy-handed palm grip to a light, nimble fingertip touch. But once that muscle memory locks in, and you begin gliding through timelines, switching desktops with a flick of your fingers, and scrolling smoothly through data, the brilliance of the device becomes undeniable.

It is sleek, incredibly durable, tightly integrated into macOS, and vastly more productive than its critics give it credit for. It’s time to stop laughing at the charging port and start appreciating the engineering marvel hiding right under our fingertips. The Magic Mouse isn’t a design failure; it’s Apple’s most underrated productivity weapon.